Have you ever wanted to make a website using a WordPress theme? Building a website can be a daunting task if you’re not tech-savvy. But you’re not the only one who feels that way. We’re here to help you achieve your goals.
You don’t need to know how to code to create a WordPress website. We’ve made a detailed guide that will walk you through the process.
Plus, you don’t have to be an expert to use this guide. It’s suitable for users of all levels and abilities. However, if you run into any trouble, our professional team will assist you with your website setup for free.
Now, let’s explore how to build a website using a WordPress theme.
How to Make a Website using a WordPress Theme
Muốn Số Hoá Checklist Trên Điện Thoại?
Nhân viên chấm điểm, chụp ảnh, báo cáo về Trụ sở tức thời — không cần giấy bút.
Step 1: Website Setup
Picking the wrong platform is one of the most common mistakes that newcomers make. But you are lucky; you are here, so you will not fall into that trap.
A self-hosted WordPress.org platform is ideal for the majority of users. It has thousands of themes and plugins that let you create any kind of website you can imagine.
WordPress is completely free to get started with and use to quickly create a website.
So where does the cost come from if WordPress is free? Yes, it’s free, but you will need to set up your own domain name and web hosting provider, both of which are costly.
- A domain name (which costs $14.99/year) is the internet address for your website. This is what your visitors will enter into their browsers to get to your site (For example, thimpress.com)
- A web host (starting at $7.99/month) is required for all websites on the internet to store their website files. This will be your website’s internet address.
We can say it’s a lot for most newcomers. Fortunately, there is Bluehost, which offers a free domain name and a discount on web hosting.
Bluehost is one of the world’s largest hosting providers.
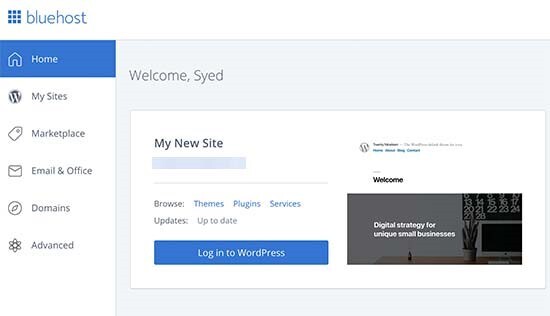
After you complete your purchase, you will receive an email with instructions on how to access your web hosting control panel (cPanel).
This is the dashboard for your hosting account, where you can manage everything from getting support to setting up emails. Most importantly, this is where WordPress will be installed.
Step 2: Set up WordPress
You can see a 1-click WordPress installer to make website creation easier for non-technical users.
To get started, simply log in to your Bluehost account and then click the Login to WordPress button. This process has significantly reduced the learning curve required to create a website.
To access the WordPress dashboard, you can type yoursite.com/wp-admin/ in your browser’s address bar.
With your Bluehost account, you can create multi-websites by clicking My Sites and using their 1-click WordPress installer to create more websites.
Once WordPress is installed, you can begin customizing your website’s design by selecting a new template and adding new pages.
Wasn’t that simple?
Let’s proceed to the next step and select a design for your website.
Step 3: Choose a Theme
Do you know that the look and feel of your WordPress site are determined by a WordPress theme?
WordPress themes are ready-made templates that you can install on your website to change how it looks.
Each WordPress site has a default theme. If you go to your website, then it will appear something like this:
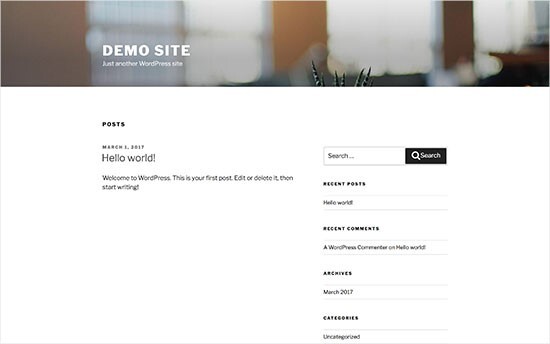
Most users will not find this attractive. Luckily, there are thousands of free and paid WordPress themes that you can install on your site.
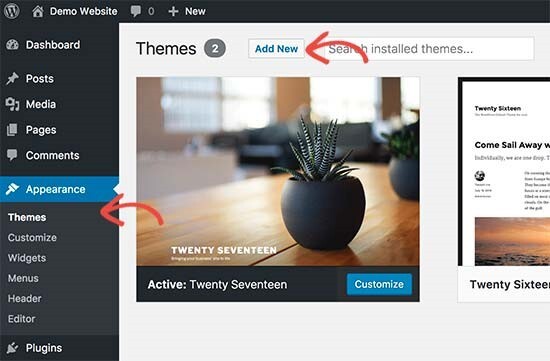
You can change your theme from the WordPress admin dashboard -> Appearance -> Themes and click the Add New button.
Next, you can browse through thousands of free WordPress themes available in the WordPress.org themes directory. You can filter them by popular, latest, featured, and other criteria.
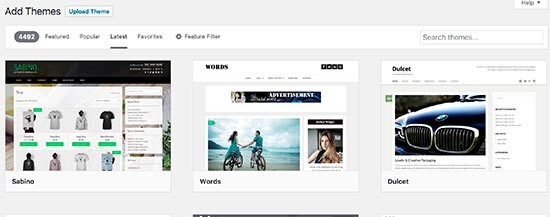
For the purpose of this guide, we’ll be using Bento. It is a popular multi-purpose free WordPress theme with versatile design options for all kinds of websites.
If you want to create a stunning premium WordPress theme with tons of features, we recommend using these popular themes:
- Eduma: Eduma is a versatile and powerful WordPress theme for education websites. It is compatible with the LearnPress plugin, which allows you to create and sell online courses, manage students, and track their progress. Eduma also comes with more than 30 premium demos, a drag-and-drop page builder, and various payment methods. Whether you need a website for a school, college, university, or online learning platform, Eduma can help you achieve your goals.
- Sailing: Hotel & BnB WordPress Theme is a stunning and elegant WordPress theme for hotel and travel websites. It integrates with the WP Hotel Booking plugin, which allows you to create and manage your rooms, bookings, pricing plans, coupons, and more. Sailing also comes with four beautiful demos, a drag-and-drop page builder, and various payment methods. Whether you need a website for a hotel, hostel, resort, or vacation rental, Sailing can help you impress your visitors and increase your bookings.
- Course Builder: The Course Builder WordPress Theme is a high-quality LMS (Learning Management System) theme for creating online courses for anyone. Course Builder’s flexibility and power allow you to easily create beautiful online courses, share your knowledge, and sell them. The flexibility and power of Course Builder can help you easily create beautiful online courses, share your knowledge, and sell them.
- Coaching: Life and Business Coaching WordPress Theme is an eye-catching, versatile, and multipurpose WordPress theme designed for instructors, life coaches, business consultants, therapists, health coaches, and personal trainers. Its ultimate goal is to assist individuals and businesses in the coaching industry in marketing their speeches, services, and consultancies to the world. Due to its incredibly attractive designs and simple-to-use Website template solution that maximizes user satisfaction, Coaching is unique.
- RealPress: RealPress has an incredibly potent real estate plugin called RealPress that has all the features required for you to quickly create a real estate website. This plugin is made for luxury real estate projects, such as houses, offices, buildings, apartments, condominiums, and villas. RealPress is a perfect fit for real estate brokers, real estate firms, real estate agents, architects, building firms, and more.
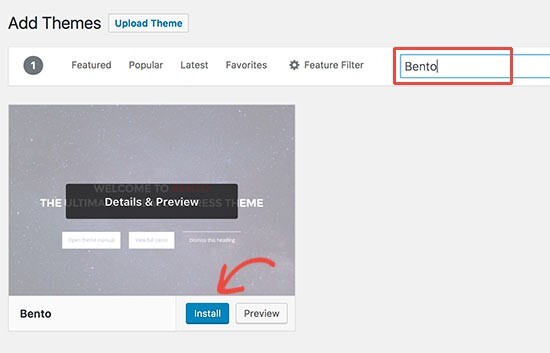
Now, let’s see how easy it is to install a theme in WordPress: We’ll use Bento as an example.
After finding the best free themes, you just need to type that theme name in the search bar and spot the theme in the search results. Hover over that theme and click Install.
After installing your theme, you can customize it by selecting the Customize option from the Appearance menu.
This will launch the theme customizer, where you can change your theme settings without leaving the site.
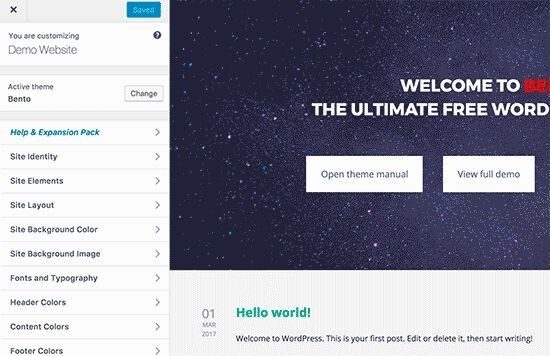
You’ll see a different version of the site customizer if you’re using the newer full-site editing themes.
The default WordPress customizer and full site editing, on the other hand, do not provide a true drag-and-drop customization experience.
That’s why many website experts and business owners choose to use a page builder to customize any aspect of a theme to suit their needs.
It allows you to create a fully custom theme with no code.
You don’t need to finalize all the theme settings right away. You will be able to customize it much better once you have some content on your website.
Step 4: Create Content for Your Website
There are two WordPress default content types: Posts and Pages.
Posts belong to the blogging feature and show up in reverse-chronological order (newer items come first).
Pages are intended to contain static “one-time” content such as your about page, contact page, privacy policy, custom landing page, and so on.
WordPress displays your blog posts on your website’s front page by default. You can change this and have WordPress display any static page as your website’s homepage.
To display your most recent posts, you can set up a separate page for your blog or news section. You can also create a website without a blog section at all.
Let’s begin to add some content to your site. Remember that you can always add a few pages to your site and edit or update the theme.
Go to your WordPress dashboard -> Pages -> Add New to create a page.
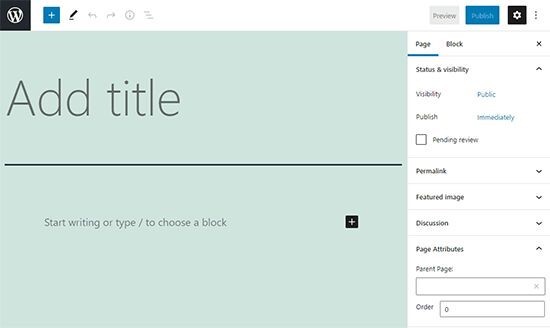
You need to enter your page title, add content (text, images, links, video, audio, and more), and set up its page settings. Don’t forget to Publish it and make it live on your site.
To create more pages for different parts of your website, such as an about page, a contact page, or a blog page, you can follow the same steps again.
After having a blog page, let’s create blog posts.
Back to WordPress Admin -> Posts -> Add New to create a post.
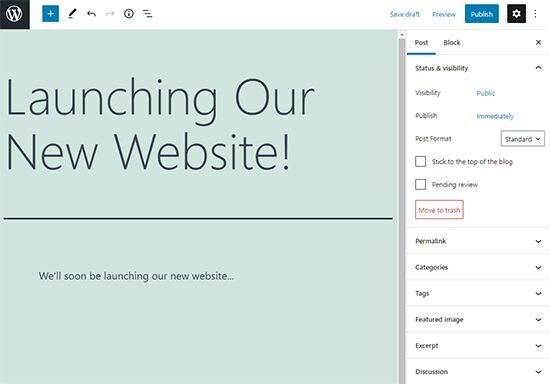
You can start with a blog post title and write your content. Then explore the sidebar on the right to tweak the format, category, tag, and more.
You can choose to make it visible on your site by clicking on the save or publish button, or you can save your blog post as a draft.
Step 5: Customizing and Tweaking Your Website
You can now customize the content you have created for your website to make it more attractive and user-friendly.
The first step is to make a static front page (or homepage).
Configuring a Static Front Page
Open your WordPress Dashboard -> Settings -> Reading and finding the front page displays.
Select A static page (select below) and choose Home for the Front page and Blog for the Posts page.
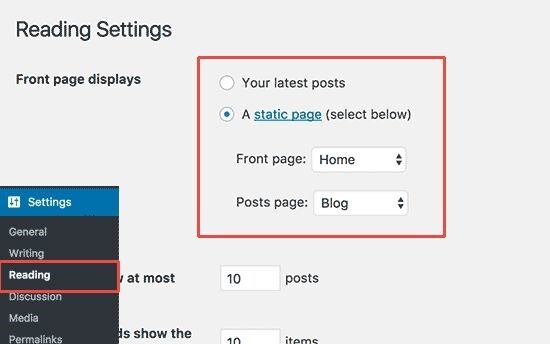
Remember to hit the Save Changes button to save your changes.
Change the Site Title and Tagline
When you install WordPress, you get to choose a title for your site. WordPress appends a tagline to your site title that says ‘Just another WordPress site‘.
You can edit your site’s title and tagline at any time by going to the Settings –> General page.
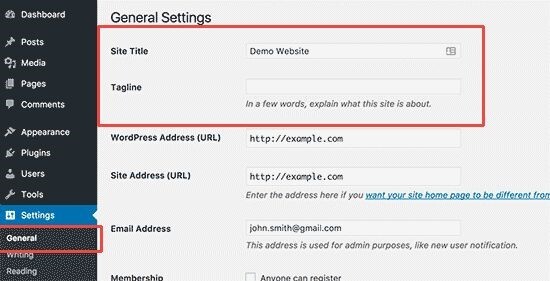
Your website’s name is the site title, like ThimPress. The tagline is typically a one-line statement that summarizes your website.
You don’t have to fill in the tagline field if you don’t want to, because SEO plugins such as AIOSEO, Yoast SEO, and others will replace it for better search engine optimization.
Remember to save your settings.
Setup Comments Settings
WordPress allows your users to comment on your posts with a built-in comment system. This is beneficial for WordPress user engagement, but it also attracts spammers.
To handle this, you’ll need to activate comment moderation on your website.
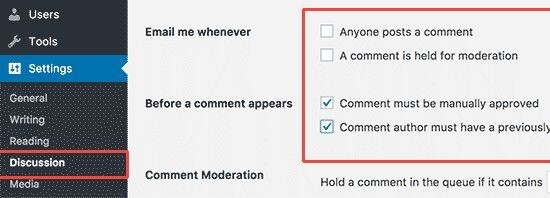
Open your Dashboard -> Settings -> Discussions page and scroll down to the Before a comment appears section.
Mark the box next to the Comment must be manually approved option and save your changes.
Create Navigation Menus
Users can use navigation menus to explore different parts of your website. To display menus, your WordPress theme makes use of WordPress’s powerful navigation menu system.

Open your Dashboard -> Appearance -> Menus, type a name for your navigation menu creation, and hit Create Menu.
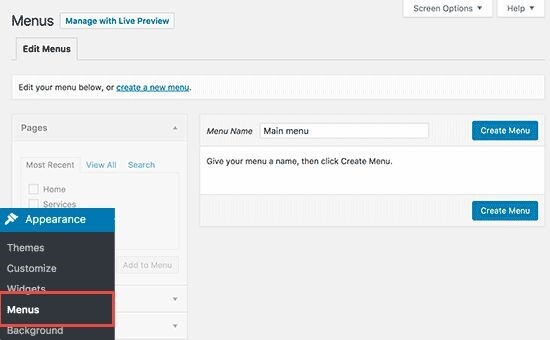
Your navigation menu is now created by WordPress. However, it has no items yet.
You have to pick the pages that you want to show in your menu and then select the Add to Menu button.
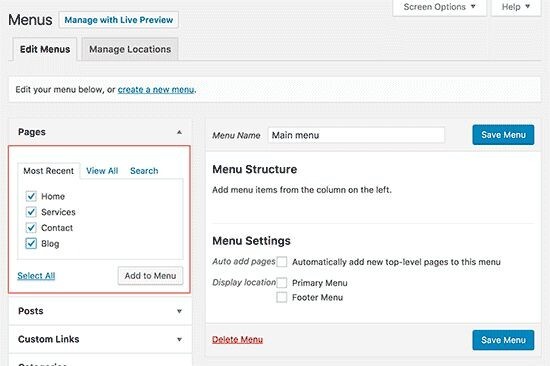
The empty area of your navigation menu will be filled by your selected pages. You can drag these menu items to change their order in the menu.
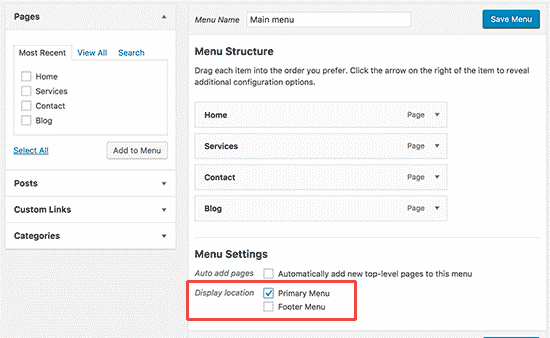
Next, you have to choose a display location. Your WordPress theme defines these locations. Typically, most WordPress themes have a main menu that shows up in your website’s header at the top.
At last, click Save Menu to save your navigation menu.
You can now go to your website to check out the menu.
Step 6: WordPress Plugin Installation
WordPress Plugins are like applications for your site. They let you add functions and customizations quickly with a few steps. For example, security, contact form, SEO, etc.
There are almost 60,000 free plugins available for WordPress right now. There are also paid plugins available from third-party websites and developers.
If you are installing a plugin from the official WordPress plugin directory, then you can use the plugin search feature in your WordPress dashboard (Plugins -> Add New) and enter the plugin name.
Here is our list of essential plugins that you should get for your site as soon as possible. They are all free.
For Security:
- Updraft Plus: Automatically backup your website at regular intervals.
- Sucuri: Malware detection and security audits for websites.
Website Performance Improvement:
- RankMath, All in One SEO, or Yoast SEO: Enhance your WordPress SEO and increase your Google traffic.
- WP Super Cache: Free WordPress speed optimization plugin that uses caching.
Additional:
- WooCommerce: Build an eCommerce site. Allows you to easily set up an online store and sell physical products.
- Elementor: To create professional and pixel-perfect websites with a drag-and-drop interface.
- MemberPress: To create as well as sell online courses and digital memberships.
- OptinMonster: To grow your email list and improve your website conversion rate with dynamic popups, modals, and other smart personalization features.
- Envira Gallery Lite: To add stunning image galleries to your WordPress site.
- WPForms Lite: To add a contact form to your site. Contact information is always displayed on the same page as the contact form on all professional websites.
These plugins are very popular and widely used by many websites. However, you may also need to install other plugins that suit your specific business goals and needs.
For example, if you run an online course website, you may want to use LearnPress. Therefore, you should choose the plugins that best fit your website’s purpose and niche.
Final Thoughts
We hope that this guide was useful for you and that it helped you learn how to create your own website without having to hire a web designer or spend a lot of money on the process.
📋 Khám Phá Kho Template Checklist Miễn Phí
Tải miễn phí 20+ template checklist chuẩn ngành — từ QA VSATTP, Housekeeping, Planogram đến Training Matrix và Mystery Shopper Score Sheet.
📋 Mẫu checklist liên quan: Cross Digital Website Daily Check · Cross Annual Performance Review · Cross Audit Health Score Quarterly
🛠️ Công cụ hữu ích: Checklist Lite · Meeting
📖 Xem thêm: Chiến lược Mystery Shopper A-Z · beChecklist là gì?
Follow bePOS: