Anyone who schedules and manages appointments for a business knows how tedious it can be, especially when the staff is limited or infrequent. The online appointment scheduling system significantly reduces the reciprocal tediousness of appointment setting and confirmation.
With a reservation calendar, customers or colleagues can schedule appointments and meetings right on your WordPress website. It’s a self-service system that can make life a lot easier.
Business owners can also charge appointments and collect payments online, so you no longer have to worry about getting paid on the appointment date. They can also use the reservation system to offer rental services or events and allow interested people to schedule it easily. Viewing your scheduled appointments can also help keep your business organized.
How To Create A Salon Booking System With WordPress
If you have ever had to deal with the inner workings of managing a salon, spa, or hotel, you’ll know the importance of having a salon booking system and how it facilitates convenience for managing reservations.
Basically, the salon reservation system is a system that controls your client’s reservation. Until recently, everything was in a notebook, and you will have to keep an eye on who paid and how much they paid. With the digital age, this is the past. If you use the digital salon reservation system, you won’t have to remember to write everything down on a single sheet of paper.
One of the most common, recurring problems with traditional methods is that sometimes schedules and organizations, in general, can get confused. With digital papers, this doesn’t happen, as they are always kept in order, and customers can see the free space and schedule.
Even accepting payments can be done online, so the system will let you know if services have been paid for. All this without having to make individual calls to authorities.
Today, this article created by our team at bePOS will show you how to create an online salon reservation system using WordPress. The process is easy and intuitive, and once it is done, it should save you a headache.
Reasons for creating a salon booking system in WordPress
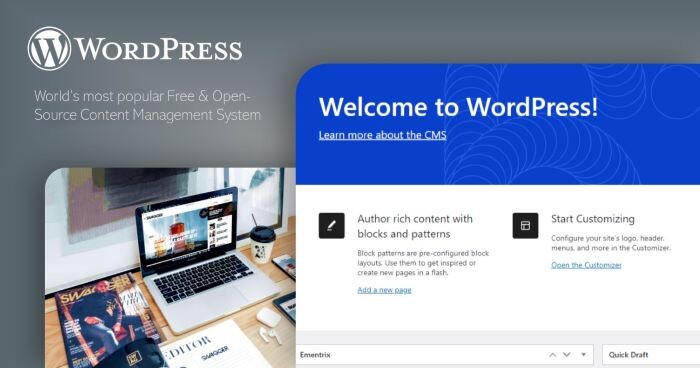
Whether you own a salon or just rent a room, organizing everything on the web can help you perform better. Also, today anyone can create a simple management website using WordPress, so there’s no reason not to have a managed website.
Currently, 30% of websites worldwide use WordPress as the base platform for their designs, as it provides an easy to understand and editable interface for any user. Due to WordPress’s popularity, you can find many add-ons to tailor your websites to your needs. Whether you need to create a checkout system, image galleries, social links, or any other piece you can think of, chances are it already exists for WordPress, and you need to download it and activate it.
Small and medium business owners who can use WordPress to create a high-quality site without designing a fully custom platform can be costly. Alternatively, if you want to renew your website’s look and feel, you can do it yourself.
What Does Your Salon Booking System Need?
If you are seriously considering designing a website specializing in booking management, several aspects cannot be overlooked.
With WordPress, it’s easy to create a payment system using plugins like WooCommerce or Easy Digital, including an on-page shopping cart. If you are using WooCommerce, add other great plugins to your website.
The reservation schedule is the fundamental backbone of any reservation system. The calendar allows you to keep track of availability, besides, to inform your customers if they can receive the date and time they requested.
Included with this calendar must have an automatic availability verification system so that the computer is responsible for accepting or rejecting the user’s request. This way, it is guaranteed that there will be no errors in the schedule, and the two will not take up the same amount of time.
A notification system is also essential. When a reservation is made, the salon’s booking software must let the customer know that the entire process has been completed. The optimized notification system will also send a message to a customer’s email that can be used as a profile and includes booking data for them to consult later.
Planned changes can occur, so a refund and cancellation system is always required. Having this in place will save you on legal and accounting matters.
It is essential to give customers information about your salon; people often want to see where they are going, so it’s good to add some info and pictures on the booking page. This is also a great way to draw attention to your service.
-
Payment support
As mentioned, a handy feature for any reservation system is the ability to accept payments. With WordPress, this means integration with shopping cart systems, such as WooCommerce or Easy Digital Downloads.
Once integrated with the shopping cart system, customers can pay for events or rentals without contacting your team. And you won’t have to worry about whether or not the client has paid for it as part of the sign-up process.
-
Multiple appointment schedules
The ability to have multiple booking calendars on a WordPress site is helpful for those who offer different types of appointments and services with different availability.
Here’s an example of how this works:
Let’s say you run a hair salon that offers different services like haircut, coloring, and hair removal. Employees have different availability capabilities for each service, and services take time differently. A website for this salon powered by WordPress may have a calendar that allows customers to schedule each service.
With multiple calendars, people can choose the specific type of appointment they want to book. Each calendar has event duration, email notifications, description, appointment form, and more.
- Custom reservation information
Different businesses may need different information from a customer when making an appointment. Getting accurate information will help employees decide to accept or decline an appointment and know what to expect before the meeting.
For example, if you have a schedule for customer support appointments, it’s good to know what the client is having and which product and basic contact information.
With CM Appointments Booking Pro, WordPress admins can customize forms with an easy drag and drop interface that includes 7 different fields.
- Set the appointment duration
Another important feature of a good online appointment scheduling system is the ability to specify an appointment duration so that both parties know exactly how long the meeting will last.
With CM Booking, WordPress admins can assign an appointment duration for each calendar.
- Determine availability
If you are a pro with a busy schedule or specific availability for different services, it will help define your schedule in your booking schedule. This way, the client knows the available days and times to schedule and can’t schedule appointments when you’re busy.
Admin can define free time in the CM Appointment Reservation plugin, but they can also specify holidays.
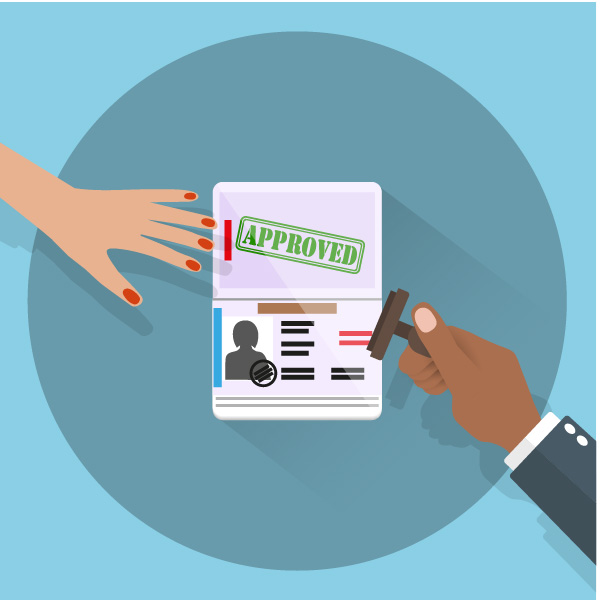
- Approve appointment
There are several reasons an administrator might not want to approve a reserved meeting, so it’s important to do so easily.
Some issues can be resolved via email and do not require an email. Maybe you need to add more information before the meeting.
Whatever the reason, the CM Bookings plugin gives you the option to decline, accept, or discuss appointments. Admin can also email a custom response to a client to share the reason for rejecting the appointment.
- Pre-order on mobile devices
The importance of having a mobile-friendly booking schedule cannot be underestimated. Since so many people use their phones to schedule meetings and appointments, your WordPress site must be able to keep up.
With the CM Booking plugin, the mobile viewing changes the calendar to a daily view to easily see availability. This makes it possible for customers to schedule appointments on the go. Also, mobile payments are supported.
These 7 features of a good appointment scheduling system make the employee’s life easier and provide a better user experience for potential customers. This can encourage more subscribers, which can directly increase sales.
If you don’t use the reservation system to receive payments directly, it can also drive a more positive customer service experience, encouraging customers to buy more products.
The possibilities of using the reservation system on your WordPress website are endless. Make sure you use a plugin like CM Appointment Reservation to have all the features you’re looking for to make your life and that of your clients.
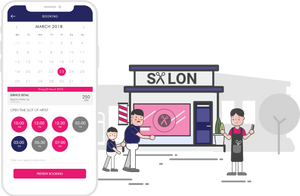
How to set up a Salon Booking System in WordPress with BirchPress
Minimize the effort to receive calls and make reservations more convenient with online access! Whether you run a salon or own a dental clinic, the online booking system is a great way to manage all of your reservations and appointments conveniently from one place.
So we’ll show you how to set up your own booking system right away.
What users expect from an efficient booking system,
- Empty Status Calendar: Empty Status Calendar notifies the user of available positions and previously reserved positions.
- Related details & photos: It’s important to provide guests with as much information about the reservation as to make it easier for them to make a decision.
- Payment Options Provides users with options for making simple payments. Besides, customers appreciate if they can save their billing information to make work easier next time.
- Confirmation Message: Sends an alert to the customer confirming that their appointment has been made.
- Cancellation & refund: Customers have the ability to cancel the appointment & get a refund
In addition to these basic functions, there are also business-specific features that you need to think about. For example, the Hotel reservation system must be able to translate and accept international payment methods.
Now, this seems overwhelming. Adding all of these functions independently is a lot of work! Solution: use a good booking plugin! It’s simple, convenient, and adds all the features you need in one go.
We will use the BirchPress plugin to set up our Online Booking System in WordPress.
BirchPress is a WordPress appointment booking plugin that can be used for many different types of businesses. It is specifically intended to help small business owners easily integrate booking functions into their WordPress website. It allows you to create an official online booking system without much effort.
Using an appointment booking plugin like BirchPress can make a difference in how you make, manage, and track appointments. It eliminates any manual effort on your part and makes the whole process smoother and easier to manage.
There are also many things you can do with BirchPress, like integrating your WooCommerce store, syncing your personal calendar, adding PayPal as a payment method, and we strongly encourage you to check out all of this feature!
To get started, you need to install and activate the BirchPress plugin. Once the plugin is activated, navigate to the Appointment tab.
Step 1: Add a location
Start by adding all of your existing store/organization locations. If you only have one store, that’s okay, but if there are multiple locations, make sure you add them all using the Location Tab in Appointments.
Adding all of your locations makes it easy for customers to schedule appointments at a location convenient to them.
Click Add a location and fill in the corresponding information in the fields. Please provide your contact information, address, and other details to make it as informative as possible. Then click Publish to add the placement to your booking system.
Step 2: Add a service provider
The Providers section of the Appointments tab helps you add profiles of the people you work with within your facility. These are the people on your staff, be it different doctors, dance coaches, or hair stylists with different specialties.
This way, customers can schedule an appointment to meet with a specific employee depending on what they want from the appointment.
BirchPress shows service providers in alphabetical order. For each profile, you can get a short description of the person and include their time and date. Customers will only be able to schedule appointments for those times available.
Now, while this is enough for a simple booking system, you can upgrade it with some of the premium functionality that BirchPress offers:
- Add an exception to block inaccessible times in between, such as lunchtime.
- Block a specific carrier’s holidays for holidays and events
- Select a color that represents each service provider on the calendar
- Sync your personal calendar
- Add carrier email id.
Step 3: Add the services you provide
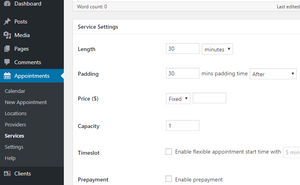
The Services tab is where you add all the services you provide.
Clicking the Add New Service button opens a new window that allows you to add your service name and description for it and explore the settings.
The service settings section is where you specify the appointment duration, the amount of time to buffer between cleaning and setting up, the fees, and the number of people that can be greeted during an appointment.
And finally, you can specify who can perform a particular service and the locations in which they are present.
Step 4: Add a booking form to a Post or Page
Once you have established the basics, you can display a booking form that is easily accessible on pages or posts. All you need is a simple shortcode!
Insert the [bpscheduler_booking_form] shortcode wherever you want the booking form to appear on your page or post.
You can also filter the fields that appear on your booking form, depending on the page. For this, we need to modify the shortcode a bit. Specify the id for the location, staff, and services you want on the booking form.
Check out this example below:
[bpscheduler_booking_form location_ids = ”1,2 ″ staff_ids =” 3,4 ″ service_ids = ”5,6 ″]
This shortcode will only show 2 locations with ids 1 & 2, employees with id 3 & 4, or service with id 5 & 6. To easily find the id that belongs to a location, employee, or service tool, All you need to do is hover over the name and check the screen’s bottom-left corner.
The id you are looking for is any number after the ‘post =’ part of the link.
Step 5: Add a booking form in the sidebar widget
You can use the same [bpscheduler_booking_form] shortcode, with or without modification, to add a consistent booking form in your site’s sidebar widget.
Go to Appearance -> Utilities. Create a new Text Widget and insert the shortcode in the content box. Viola! Your booking form widget is ready!
Step 6: Customize the booking form
It’s possible that the default booking form BirchPress offers may not be right for your business requirements. BirchPress gives you the freedom to customize your own booking form. Navigate to the Form Builder tab under Settings. Easily Add and Edit fields to create the booking form that’s right for you!
Step 7: Send confirmation email to employees and customers
Every time someone makes an appointment, you can email confirmation and a reminder. Notify both customer and service provider that the reservation has been made. All you have to do is click the “Enable” checkbox in the “Notifications” tab.
To ensure a smooth notification process, create predefined email templates when you want to email a new appointment, canceled appointment, modified appointment, or reminder.
Note that this is a premium feature, and make sure to add your carrier email id in the carrier tab. You may also need an SMTP plugin if your web hosting service doesn’t support email.
Step 8: Cancel and reschedule the appointment
Create the pages ‘Cancel Appointment’ and ‘Reschedule’ using two simple shortcodes [bpscheduler_cancel_appointment] and [bpscheduler_reschedule_appointment].
Go to Settings -> Navigation.
For Cancel Pages and Reschedule Pages, select the pages you just created. Make sure that you hide these pages from the website menu.
When emailing a client, you can insert cancel and reschedule links with {cel_url} and {reschedule_url} tags in the email template.
Therefore, if, for whatever reason, they cannot make an appointment, it can be easily handled.
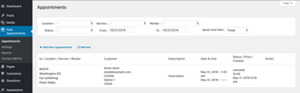
Step 9: Add, delete, or reschedule appointments.
The Calendar section under the Appointments section is where you can view and manage all of your appointments.
It allows you to add new appointments easily and also delete and reschedule them if needed. This way, even if someone makes an appointment without using the booking form on your website, for example – by calling, you can keep track of all of your bookings.
The calendar also simplifies the way you view appointments by giving you the option to filter them by location, employee, or time period.
How to set up a Salon Booking System in WordPress with Start Booking
StartBooking is a complete appointment and booking plugin for WordPress. It is effortless to use and allows you to quickly set up appointments and booking forms and add them to your website.
You can modify it to meet your needs by adding working days and hours, time slots available, adding multiple services and users, allowing customers to choose employees, and more.
You can display a reservation form on your website by simply selecting a page in the plugin settings. You can also add different forms for different services using the shortcode.
To view and manage your reservations, you can log in to the plugin website and see all your appointments on your dashboard. It also integrates with Google Calendar, allowing you to see your reservations across all devices.
Setting up an online booking for WordPress has never been easier with the Start WordPress Booking plugin. This article will guide you in setting up reservations for WordPress and highlighting some strategies for success.
If you have already done this, then chances are you already understand the power and flexibility of WordPress and are looking to set up booking functionality so your customers can book time right from your WordPress site. We talked to countless customers looking for this same functionality, and luckily with the Start Booking plugin, having a WordPress booking plugin has never been easier.
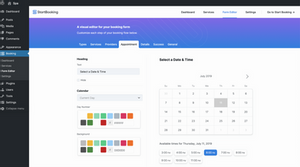
Once you have installed and activated the WordPress Start Booking plugin, click on the newly added Booking tab in the left navigation, and you will see a welcome screen like below.
To set up a new account, enter your first name, last name, email address, phone number, and create a password. From here, you can click on the blue “Continue to the next step.”
If you already have a Start Booking account, you’ll fill in the information above. However, you’ll click on the blue “connect account” button in the screen’s bottom right corner. Your Get Started Booking login will sync your WordPress site with the Start Booking app.
Once you’ve done one of the above methods to connect your account, you’ll be taken to the Start Booking dashboard screen. The Get Started Booking dashboard confirms that you have successfully set up your WordPress reservation.
The plugin settings screen can help you further optimize and set up the online booking for your exact needs. You do not have to change any of the settings on this page, but you can.
Embedding options
There are two different ways you can set up a reservation process on your WordPress site. You can implement shortcodes and insert them into any page or post. You can also use the Gutenberg block option. To use Gutenberg blocks, simply navigate the page or post where you want to display your booking form.
Services and Classes will be displayed separately. You’ll want to embed the class booking form and the service reservation form in two pages. The shortcodes for that are noted below.
[startbooking flow = “services”]Example: Let’s say you are a salon that has several services. You will have a Book Now page with the shortcode [startbooking flow = “services”] in the content. This page will display all the services you provide with the price (optional) and the service description.
[startbooking flow = “classes”]This shortcode is used to bring your client to a page where your classes are listed. From here, they can book and pay (optional) for your classes.
General settings
Under General Settings, you’ll be able to enable booking limits, opening times, position type, currency, and several cancellations for your bookings.
Reservation Limits – allows you to set the earliest and most time when a client can schedule an appointment.
Opening interval – allows you to set a time span for available appointments. The default for this function is every 30 minutes.
Location type – This will allow you to show your business address to customers.
Currencies are where you choose the currencies you accept for your services.
Cancel – here, you can send a link with the appointment confirmation email to the client so they can cancel their appointment.
Time Zone and Language
Time zone and language allow you to define the time zone in which available appointments will display to your customers.
Integration
Google integration is a great way to keep your Google calendar aware of all your appointments created in the Get Started Booking app. Whenever an appointment is created, we push it to your calendar in real-time. We also listen to the Start Booking appointments in your google calendar and update them in the Start Booking app.
Accepting payments has never been easier with the help of the Get Started Booking platform. With Stripe integration, you can connect you’re Getting Started Booking to your Stripe account. This allows you to accept payments at the time of the customer booking if you choose.
Connect
The Connections section gives you the ability to disconnect your website from the Start Booking app. If you disconnect from the Start Booking app, your ability to accept online bookings on your WordPress site will stop working. After clicking disconnect, you will be returned to the welcome screen at the top of this article.
Disabling the seat settings gives you the option to temporarily disable booking on a website without disconnecting from the Start Booking app.
If you have any problems setting up a reservation for your WordPress site, please contact our support team to help you out.
To get started with Hand-on Start Booking, you’ll need to create an account at the Get Start Booking website (get started free!).
Once you’ve created your account, Start Booking takes you through a convenient little setup/referral process to help set up the basics.
And then you’re on the Hand-on Start Booking cloud dashboard. I’ll show you this later, but there’s not much yet because… I haven’t set up Get Started Booking on my WordPress site yet!
How to set up Start Booking on your WordPress site
To integrate Preset Get Started into your WordPress site, you use the dedicated Get Started Preset plugin available at WordPress.org.
After installing the plugin, you can go to the Reservations tab to connect to the Start Booking account you created in the previous step. All you need to do is log in to your account from the interface, and then you will be connected. After connecting your website, you will unlock the settings page.
Start Booking automatically creates a Book Now page for you. But you can also use different shortcode options to customize how things work.
Get Started Booking includes two different shortcodes you can use:
- Full Flow – by default, this is what it adds to the page it creates. The user chooses from a list of available services and then makes a reservation.
- Quick checkout – lets you choose a predefined service and bypass the user choosing from your complete list of services. You can also customize the text used on the button, which allows you to provide a unique CTA for each service.
And you also have other options for:
- Instant booking – allows you to speed up the booking process if certain conditions are met (like only one service)
- Content customization – allows you to customize all of the text strings that appear on your booking form. This is good for localization. Or, you can convert the English text to suit your needs better.
- Additional options – let you do things like hide the progress bar and set limits for pre-scheduled user intervals.
Okay, that’s all for the configuration options in your WordPress dashboard. But you also have more control over the individual services and availability in the Start Booking cloud console.
How to configure settings in the cloud console (Services, Hours, + Others)
When you configure basic WordPress installation, you do most other configurations and day-to-day management in the cloud dashboard.
First, we will show you the rest of the available options. Then I’ll demonstrate how the whole process comes together to help you manage your appointments.
You can first configure your opening hours for each day in your Starting Booking account profile.
In addition to overall location hours, you can also configure hours for each user.
This gives you a bit more flexibility as you can include a lunch break.
But for both of these options, we’d still like to see more flexibility in non-traditional time handling. That is, if you have a schedule that doesn’t fit the traditional “9-5 with lunch break”, Start Booking can’t seem to adapt.
You can also create and edit services from the cloud console.
When you create or edit a service, you can go a little deeper by:
- Assign services to specific users
- Select the duration of the service
- Create a “recovery” time so that you have room between bookings
- Price setting
- Turn off online booking (if you want, you can simply use Manually Start Booking as an appointment management solution without making an online reservation).
Finally, you can also enable/disable email notifications for certain events in your profile and choose a default interval for open times.
Paid plans can customize email text. But I wasn’t able to do that in my free plan.
That’s pretty much for the configuration options on the package that I have access to! But if you’re on the Business plan, you can also configure different rooms at your business (for example, if you run a massage business with separate massage rooms).
How user appointment scheduling works
Now that everything is configured, here’s how the process works for your visitors to see availability and/or book an appointment.
One interesting thing in this process is that if a user enters an email address already being used, Start Booking will automatically download their profile information, so they don’t have to re-fill it.
It is handy for removing conflicts for old customers.
How does the appointment booking process work for businesses?
Once new appointments arrive, you’ll be able to manage them from the Start Booking cloud dashboard.
If you click on a personal appointment, you can:
- Check out customers in
- View customer details
- Add notes (depending on your plan)
And you will also be able to see the full list of customers in the Customers tab.
If needed, you can also add both clients and appointments manually, which gives you flexibility if someone wants to make an appointment over the phone instead of using your website. Alternatively, you can use the Google Calendar integration to add and manage appointments from your personal Google Calendar account.
Getting Start Booking makes it really simple to get started on your WordPress site. You can go from nothing to accept reservations in just a few minutes.
And that factor – simplicity – is what I think is Start Booking’s unique selling proposition.
This is not the most flexible appointment system I have used, so you want many actions/filters to customize things if you are a developer. If you have appropriate needs (like do not spend standard, broken down work hours), you may be disappointed.
But if you just want an easy-to-use system to start accepting appointments without many settings/configuration options hindering you, I think Start Booking is a good choice, especially compared to one. Several WordPress plugins are more complex.
Pricing and how to get started
Start Booking offers a limited free plan, which I used for this Start Booking review.
After that, there are two premium plans. Both are billed annually:
- Individual – $ 7.99 per month
- Business – $ 19.99 per month
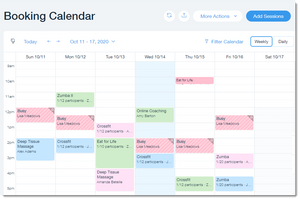
How to set up a Salon Booking System in WordPress with Booking Calendar
The booking calendar is one of the best free WordPress booking plugins on the market. It’s simple, easy to use, and well documented. It comes with a calendar view for both you and your website visitors. You can easily add your schedule/appointment form to any WordPress post or page.
While it’s simple enough for beginners, it’s also mighty and includes many options that can be configured from the plugin’s Settings page. It comes with a built-in captcha for spam blocking, email notifications, jQuery effects, and more. You can even customize the reservation form with your own custom fields.
The Booking Calendar plugin activates a great booking system for your website. Simply display availability and receive reservations for your property or services in the easy-to-use booking system with a clean and smooth interface.
Your website visitors can check the availability of properties (such as apartments, houses, hotel rooms, etc.) or any services you offer and book a minute for the whole day or a specific period of time (in Free Booking Schedule version). Different versions of the WP Booking Calendar provide hundreds of features to complete almost every booking function for your business.
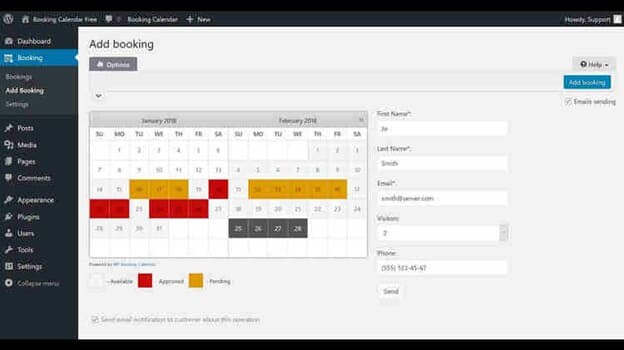
Your customers will be able to:
- Choose your calendar date (s) (customizable to match your website design)
- Choose a time period available to book in your booking form.
- Fill in the fields of the booking form (configurable – change field labels, activate/deactivate or set as required)
- Submit your reservation
- Your administrator (and your guests) will receive an email notification (s) about a new booking. They can Approve or Decline this booking in an easy-to-understand, easy to understand Admin Booking Console (with a view of all bookings of the day/week/month view of the Calendar overview mode – Timeline or only in the Book List Table).
Main benefits:
- Extremely easy to use.
- The function is very flexible. Suitable for many types of businesses.
- All reservations and settings are stored in your DB. You do not need a third-party account (s).
- Design a sleek and customizable calendar to match your website design.
- Responsive front and back design.
- The easy-to-use Booking Admin panel shows bookings in either the Calendar overview or the List panel and allows you to manage bookings.
- Easy to install and integrate into your website. For example, use the reservation button in the editing toolbar to configure and insert the booking shortcode into a post or page.
- Preset Calendar Block for the new Gutenberg editor to add booking forms to pages.
PLUG-N-PLAY
The reservation schedule is built to work properly. Just activate it and insert the booking shortcode into your post or page, and you’re ready to take on new bookings. Most settings have predefined values and small descriptions.
Performing New Booking on the Client’s side
- Book by time in the Free edition Reservation Schedule. Ability to receive simple bookings for specific time periods (time of day selected).
- Make a reservation in the friendly booking interface – select the date (s) and fill in the booking form fields.
- Prevent double booking for pre-booked dates (1 booking per day) or allow multiple (unlimited) bookings on the same calendar day.
- Book pending dates as available in the booking form. You can receive as many bookings as you need and stop accepting bookings on a specific date (s) when you have approved several bookings on a specific date (s).
- Timeline – Check reservations for a year, month or day, on the front-end of your website.
- Fully responsive booking forms and calendar assistants look great on any device.
Manage your Bookings in the Admin Panel.
- Email notification to administrators and website visitors of specific booking actions. Ability to change admin email.
- Comfortable admin dashboard for managing reservations. View bookings in the Calendar Dashboard (Timeline) to set a Day / Week / Month view or in the Bookings List.
- Search for booking (s) by different parameters, using Filters in the Admin Console.
- The ability to arrange a reservation according to several parameters.
- Set the default date format.
- Paging the reservation list.
- Ability to set different user roles for each plugin menu page.
- The administrator can Approve or Decline specific bookings.
- See the number of new bookings on the reservation dashboard section.
Synchronize presets
- Native integration with our Booking Manager plugin for the ability to import / export feeds or .ics files
- Enter the .ics feed via shortcodes at the pages. It gives great flexibility to import .ics feed from different sources (like Airbnb, Booking.com, HomeAway, TripAdvisor, VRBO, FlipKey, or any other calendar using .ics format, the cover includes iCal (iCalendar)) into the same booking resource.
- Define different parameters in the input shortcode; for example, you can set the “start from” and “end to” date condition or the maximum number of items to import or enter events only for dates with Existing calendars, etc.
- Confirm a custom ULR at the setup page to export a reservation to a .ics feed/file, which can be imported to Google Calendar (or Airbnb, Booking.com, HomeAway, TripAdvisor, VRBO, FlipKey, and any other calendar. another uses .ics format, including iCal (iCalendar)).
Events on Google Calendar
- Import events on your Google Calendar into your booking admin panel.
- Quickly manually add a reservation to Google Calendar by clicking the export button near each booking (s) on the Bookings List page.
Configure the Reservation Form and Available Calendar
- Set to show 1 or several months in the calendar.
- Set calendar width and number of consecutive months easily from settings. (Example: showing 3 × 2 months on the calendar).
- Choose your desired calendar look to better match your website design.
- Customize calendar colors by editing CSS styles.
- Set the mode to select one day or multiple days.
- Set the number of days not available in the calendar, starting with Today.
- A set of specific weekdays is not available.
- The ability to customize the calendar annotation.
Set different parameters
- Manage unlimited form fields in your booking form.
- Change the label near the field of each booking form.
- Activate or deactivate specific form fields.
- Place the specific field (s) required on your booking form.
- Verify the required fields and enter the correct email.
- CAPTCHA support.
- Ability to redirect a customer to a specific “Thank you” page after the booking process.
- Easily integrated into posts/pages, Calendar Booking shortcodes using friendly insert dialog.
- A plugin is a ready-made widget so you can easily add a calendar or booking form to your site’s sidebar.
- Multi-language support. (Check out all available languages on this page).
- And much, much more… please check out a lot of features in the premium versions of the plugin.
Booking Calander is great for:
Thousands of users use the plugins booking schedules. Whether you run a large hotel with hundreds of rooms or you are the only business owner that needs to automate reservations for your services, we keep you in mind.
- Resource planning (bed & breakfast, cottage, hotel room, house, apartment, etc.).
- Equipment rental (car, bicycle, computer, engineering, swimming pool, etc.).
- Scheduling clients (photographer, lawyer, beauty salon, spa, massage therapist).
- Schedule a meeting (training, telephone consultation).
- Schedule events (conference, course, fitness center, yoga class, gym).
- Schedule for patients (doctor, dentist, clinic, medical).
- Or any other service where reservations can be made for a specific date (s).
Step-by-step Guide:
Schedule page:
- On this page, you can add a new Scheduler, edit or delete the existing.
- Click “Add” to create a new one.
- Enter name. Then choose Subject, Form, and Add.
Then select a date (click a start date, then click end date, if you also need to select dates from subsequent months, then click the start date and change a month from the top, then select end date )
After you choose a date, you will see these options.
- Set Availability – Set date status using this option (Available, Pre-ordered, None).
- Availability – Set a quantity for what’s available (rooms, places, or anything a user should book) for a day.
- Price – Enter the price for a day.
- Marked price – Enter the marked price for a date.
- Information for users – Enter information here for your users (they will see it on the front end).
- Information for administrators – Enter information for the administrator here (the admin will see information from the admin panel).
Booking page:
On this page, you can Approve, Decline, Cancel, Delete, or just view Bookings.
First, you need to select the calendar you want to check (from the top).
You then need to select a reservation and then change its status (alternatively, you can select several bookings and then change their status from the top).
If you want to see details, open it from the top right.
You can use the filters page to quickly and easily find the reservation you need. Use Status, select Duration or use the search field.
Also, let’s use the Month View; we think it’s a useful function.
Formation
- On this page, you can add new Forms or edit or delete existing Forms.
- Click “Add Form” to create a new form.
- Enter a new form name. Then click the “Plus” button to add new fields or edit existing default fields.
You can add 4 different types of fields. You can add simple text fields, TextArea, Checkbox, and Select.
Open the word field option on the left to edit text, or select an option.
Don’t forget to save the new form you created.
Extras page
- On this page, you can add new Add-ons or edit or delete existing Add-ons.
- Click “Add Add” to create New Add.
- Enter a new addition name. Then click the “Add” button to add new Secondary fields or edit existing default Subfields.
- Open additional field options from the left, then set options or delete Items.
- Also, check out the options for every item. Enter a Label, choose Activity Type, choose Price Type, enter Price / Percent.
- Save the new Secondary field.
Home themes
- On this page, you can add a new Theme, edit or delete an existing Theme.
- Click “Add Theme” to create a new Topic.
- Enter a new topic name.
- Then edit the General options.
- You can set different options for this page’s theme, such as Date format, Weekday format, Start of the week, Turn on instant approval, and more.
Then open the Styles and Colors tab and configure some design options.
You can set Maximum Width, font size, color, background color, and other design settings.
Then open the Notifications tab and configure it. From here, you can edit (turn off) all the notifications that the user or the administrator will receive. After that, open the Default Content tab and configure it. You can change the default text from here. Last save New topic.
User license page
- On this page, you can set permissions for your users.
- You can change user permissions for our plugin on all pages.
For example, if you set the user permission for the Form page to the “Editor” Role, all users can access this page.
Wood installation page
- You can remove our plugin on this page, but if you uninstall the plugin in this way, you will delete all Database Tables.
- If you think you can use our plugin in the future, then don’t use this page to uninstall our plugin (use the WordPress plugin’s standard page to remove the plugin).
Highlight plugins page
On this page, you can check out our Featured plugins.
How to set up a Salon Booking System in WordPress with WP Simple Booking Calendar
WP Simple Booking Calendar is another simple WordPress booking plugin. Just create a calendar and then add it to a post or page using the shortcode. It only allows users to book all day in advance. This means there are no hourly slots.
If you are looking for something straightforward and basic for rooms, accommodation, or other services every day, this plugin will do the job. For more complex items, check out the plugins we mentioned above.
Do you need a reservation schedule to indicate your vacation home availability? If you are renting your accommodation to tourists from all over the world, you should use this Free plugin on your website! This booking calendar comes in handy whenever you want to show the availability of a hostel, room, bed & breakfast, office, or even a piece of equipment.
Setting up and ending the booking calendar on your page reduces one minute.
Thanks to the latest updates, this available calendar is now easier to use than ever. What WP Simple Booking Calendar does is allow your website visitors to check the availability of your vacation home with just a few clicks. Plus, it gives you complete editing freedom!
The Free version gives you access to all the basic features you might need to keep track of your reservations. For advanced features like custom annotation entries and advanced editing and publishing options, you can always upgrade to Premium. By ordering the Premium version of the calendar, you’ll have access to a range of customization options and editing features.
How does WP Simple Booking Calendar come in handy?
- Displays available dates for your vacation home
- Show people when your new vacation home is available for rent, thus reducing the time spent communicating with them by phone, chat, or email.
- Can also be used as a shift schedule or to show the availability of a room, office, or equipment
Features of free version
- Create a calendar
- Show annotations near the calendar
- Simple, user-friendly interface
- Show availability
- Responsive calendar layout
- Add and save reservation information for each day on each of your booking schedules.
- Legend entries and month names translated into more than 30 languages.
- Language translation option using PO files
- Backup / restore calendar and data.
Features of the premium version
- Create an unlimited number of preset calendars
- Sync your calendar with Airbnb, Booking.com, HomeAway, and other sites that support iCal
- Display for many months
- Batch editor: Multi-day editing with one click
- Create your own annotations (apply your own colors and languages)
- Export the data as a CSV file
- Manage users: assign specific users to specific calendars.
- Change the first day of the week.
- Change of the starting month/year
- Show tooltips with information (you can enter information for each day)
- Display the number of the week (from 1 to 52)
- Hide booking history from your visitors
- Enjoy a variety of easy-to-use and display language options.
- Generate a shortcode to display a reservation schedule on a page or post
- Overview of multiple calendars
- Marks the current date
- Supports multiple WordPress (network) sites
- Professional support
Do you recommend your vacation home across multiple websites and need to synchronize availability data from one website to another? With WP Simple Booking Calendar, you can easily export data from your calendar to Airbnb, FlipKey, Google Calendar, and other websites.
How to add a calendar
Once you’ve created a new calendar with this WordPress booking calendar, you can add it to the necessary property sheet and modify the rest of the settings via the shortcode generator (works in TinyMCE; requires Gutenberg integration hitherto). You can use this plugin easily with your existing WordPress installation.
How to set up a Salon Booking System in WordPress with Easy Appointments
Easy Appointment is a flexible and free WordPress appointment booking plugin. It allows you to add multiple positions, services, and employees easily. You can then create flexible connections with detailed control over your schedule. It also allows you to customize the booking form by adding custom form fields.
You can easily add an appointment booking template to any page or post using the shortcode. You can also customize the plugin to send email notifications to customers, employees, and site administrators.
Download
The installation process is quite simple:
After downloading the ZIP plugin, login to the WP admin page.
- Open Plugins >> Add New.
- Click “Upload Plugin” next to the top title.
- Drag and drop the plugin zip file.
Setting
After installing the plugin, you will see a new entry in the menu on the admin panel’s left (Easy appointment). Open the Settings submenu from the plugin:
- Identify at least one location.
- Identify at least one service.
- Identify at least one worker.
After making those settings, it’s time to make a connection between them. “Connection” is the term for job placement for that employee-service-employee. You can create multiple connections for one location-service-employee. For example, if you want two free times for a specific time, you can copy the previous connection and change the time. For multiple slots, just copy the connection.
As of version 2.10, several slot options can be used to set the desired number of locations for each connection. That way, you can avoid having the same connections.
Without at least one connected location, services, and staff, there will be no free time, and users will not be able to create reservations!
For the Service, you must provide the duration in minutes and the duration of each time step. (duration / slot_step) must be a round number. For example, 60-minute duration and 20-minute time steps. (60/20) = 3!
Time management
To make available placements in the Appointment plugin, you need to make a connection between locations, services, and employees. Each unique combination of those three items is a location or capacity!
So if you want two slots at the same time, you need to copy the same connection. This way, you can adjust the time and power in any way you want. The same thing is to increase and decrease your storage at some point in time. Just copy the connection and save it as “inactive” to decrease.
Custom
On the last tab in settings, you can locate:
- Email notifications (Pending, Reservation, Canceled, Confirmed)
- Translation of the label
- Time format
- Currency
If you have completed all the settings, you can move on to inserting the front-end part of the plugin on the page or post of your choice.
To place a plugin extension to create an appointment on your site, you need to set the shortcode for that page.
Appointment status
The created appointment can have the status from the next list:
- Reservations – When a customer creates a Date and Time Selection Value for an Appointment, it automatically creates a reservation on the backside. But only if the Automatic Bookings option is checked.
- Pending – When a customer fills out the form status, it changes the Reservations form to Pending.
- Confirmed – Once the admin clicks to confirm the appointment or the client’s status does it, it changes from Pending to Confirmed.
- Ignored – This status will have an Appointment when the client clicks the cancel button at the bottom of the form. But only when Automatic Bookings are checked.
- Canceled – If the client or administrator cancels, Appointment status changes to Canceled.
GDPR – European Union data protection
As of EasyAppointments 2.3.1, there are special options for getting user consent on GDPR and European Union data protection legislation. You can define a custom check box in a customer form with Custom Labels, Custom Error Message if the field is not marked, and customize Link to a dedicated site where you can set more protection details data on its website.
Tracking (Google Analytics)
There is a callback event when a customer creates an Appointment Schedule. Just connect to the event, and you can add additional tracking service codes. The event name is easy to apply.
…
Report
The timetable report is showing all positions (free – fetched) for the whole month. There you can keep track of if your time settings are okay. The time table also helps to quickly see what the next vacant position is for that location-service-employee connection.
Export – allows you to export the data to a CSV format that you can use to import it into MS Excel or OpenOffice Calc. You can specify a date range for export appointments. The first row in the output file contains the column name. There are currently only two reports, but they are coming.
Translate
Easy appointment plugin supports translation. You can translate some labels via the settings page, but you have to create your own translation file to translate all the labels. This can be done using an external application (Poedit) or even inside the WordPress admin panel via a translation plugin (Loco Translate, GTranslate, WPML, …).
Suppose you want to keep your translation even if plugin updates, do the following. Copy the edited translation files to wp-content / languages / plugins to prevent overwriting during updating.
How to set up a Salon Booking System in WordPress with WPForms
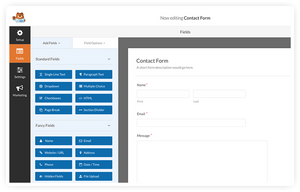
WPForms is the best WordPress contact form plugin. It comes with a beginner-friendly drag and drops form builder that easily allows you to create any type of form within minutes.
WPForms can be integrated with Google Calendar through Zapier, but it doesn’t allow you to set business hours. However, if you have WPForms installed, you can easily create a custom booking form. You will have to approve and confirm each appointment manually.
Are you ready to install the WPForms plugin? After purchasing the license, the next step is to install our plugin to start building your form.
In this step-by-step guide, we will show you how to install WPForms on your WordPress site.
Are you ready to install the WPForms plugin? After purchasing the license, the next step is to install our plugin to start building your form.
Next, click on the WPForms Download link to save the WPForms plugin archive to your computer.
Note: In some cases, this file can be unzipped when you download it and appears as a regular folder instead. However, the folder must be compressed to use the WordPress plugin uploader.
For instructions, please see these instructions for Windows or Mac operating systems.
Currently, you don’t have to download plug-ins as you can later easily install and activate the add-ins from within your WordPress dashboard.
Install WPForms on your website
Once you have the zip file, navigate to the website where you want to install WPForms. Inside the admin panel, you will need to go to Add-ons »Add New. On the next screen, click the Upload Plugin button.
You will see the option to upload the plugin. Click the Choose File button and select your WPForms zip file.
Once your file is uploaded, click the Install Now button.
WordPress will install the plugin for you. After installing the plugin, you need to click on the Activate plugin button.
After activating the plugin, you will need to verify your WPForms license key to receive new updates and plugin support.
Adding a license key will also allow you to install and activate WPForms addons from within your WordPress dashboard.
That’s it! Now that you have WPForms installed and activated, you may want to see our tutorial on creating your first form in WPForms.
How To Create A Salon Booking System With Wix
Introduction to Wix Bookings
Wix Bookings is an easy-to-use scheduling system that allows customers to book services online, so you can focus on managing your business. Whether you host seminars, courses, or private sessions – Wix Bookings has you covered. Customers can order the service directly on your site. Online scheduling
Introduce and deliver your services with a professional online scheduling platform. Create and customize your website from over 500 designed templates. Streamline your business by managing your schedule with an all-in-one booking solution.
- Displays services, timetables, and prices
- Turn leads into direct customers from live chat.
- Collect customer information with custom booking forms
- Provide a waiting list and manage your attendance
- Send SMS and reminder email.
Selling services
Increase sales and fill your schedule by selling your services right from your website. Reduce reciprocal communication by allowing your customers to book services from your calendar easily. Sell any kind of service and offer them online to reach customers anywhere.
- Appointment: This allows the client to book a private meeting with you.
- Class: Selling recurring services that a customer orders once.
- Courses: Selling all services that customers pre-order.
- Online: Reach customers anywhere by getting your services online.
- Package your services into membership packages and packages.
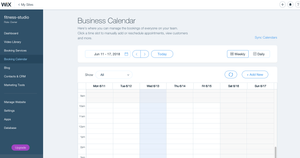
Calendar management
Manage all your calendars from one dashboard. Get the flexibility you need to schedule your business online.
- Set default working hours
- Schedule around your free time
- Sync your group’s calendar
- Automatically adjusts reservations for time zones
- Create reservation rules and policies
Payment & financial solutions
Allows customers to pay with cash, credit, or a digital wallet. Connect with your preferred payment provider and manage all your transactions and finances from one integrated dashboard.
- Connect payment service providers – Wix Payments, PayPal, Stripe, Alipay, and more
- Accept payments in more than 40 currencies.
- Send the customer the quote and invoice.
- Integrates with professional accounting tools like QuickBooks
Membership & Packages
Offers free trial, membership package, subscriptions, punch cards, and a limited time discount.
- Accept recurring payments
- Open trial session
- Provide exclusive services
- Selling member-only content
- Offer coupons and discounts
Employee manager
Manage employee schedules and track their performance. Set roles and permissions so that employees can book customers and manage their sessions.
- Set roles and permissions
- Staff working hours
- Assign sessions and classes
- Sync your group calendar
- Track employee performance
Customer management
Build and manage your customer relationships. Send automatic confirmations, updates, and reminders about upcoming sessions.
- Get new customers and contacts
- Create a detailed membership profile
- Reduce absenteeism with SMS and email reminders
- Live chat with members.
- Send class updates
Grow your business
Get advanced reservation analytics to track performance and continue to improve your business. Look at your top services, employee performance, website traffic, and more.
- Track customer attendance
- Find out how your visitors come to you.
- Focus on your most popular services
- Financial analysis
- Compare new and old customers.
With Wix Bookings, you can:
- Different types of services
- Accept online and offline payments.
- Sale of membership packages and
- Manage your calendar
- Set up your schedule for capacity control in COVID-19
- Synchronize with Google Calendar
- Create a custom booking form
- Offer Coupons
- Automatically send reminder emails or SMS messages to customers.
- View each customer’s past bookings
- Allows customers to log in to reset quickly
Create the right service for your business
Creating a successful booking website starts with choosing the right type of service for your business. Wix offers three types of booking services: Appointment, Class, and Course.
Appointment
Do you have a business that customers can book at any time available in your calendar? If so, an appointment is a service for your business.
Appointments take place whenever a customer pre-orders a period. For example, your hair salon might be open for business from 9:00 am to 7:00 pm, and customers can book a schedule any time of the day (unless someone else has booked in advance that time).
Individuals usually book appointments; however, they can also be booked by a group of people – but only if they book services together. An example is when a group of friends set up their own chef to cook for a party.
Perfect appointment for:
- Massage or other body treatments
- Haircuts or nail services
- Medical or alternative therapy
- Consultations or tutoring sessions
- Escape rooms
- Private chefs
- Photoshoots
The appointment is a service provided to customers who pre-book the available time slots. For example, a photographer can be present from 10 am to 7 pm, and a client can pre-book any time not to shoot. Appointments are usually booked by individuals but can be booked by a group booking service together.
To create an appointment:
- Go to the Booking Services tab in the dashboard of your website.
- Click Add a new service.
- Choose 1 on 1.
- In the General Information section, enter basic service information:
- Enter a service title.
- (Optional), Add an image: Click the Plus icon and upload an image.
- (Optional) Enter service subtitles (appear in your service list and service page).
- (Optional) Click + Add a description to enter more detailed information about your service (appear on your service page).
- Choose a session duration from the Session Duration drop-down menu, or click Custom to enter a custom session duration.
- (Optional) Click + Add buffer time to enter the minimum time between sessions. For example, if you have a 1-hour session and set the time buffer to 30 minutes. Then, when a customer books a session from 9:00 to 10:00, the next available time is 10:30. looking for more information
- Choose a service provider. By default, all employees will appear. Click the X next to the employee’s name to remove the first name or + Add an employee to add a new employee to your business.
Tip: Remember to set the new employee’s time afterward.
- Choose a pricing option from the Price per session drop-down:
Flat rate calculation: You charge the same per session.
- Choose Fixed price from the Price per session drop-down menu.
- Enter the session price.
- (Optional) Edit Customer pays the full amount installed online:
- Click Change.
- Select a payment option. If you selected a deposit option, enter the amount.
Custom pricing: You can offer the service for free or at different prices. Note that the customer will not pay online during the booking.
- Choose Custom Price.
- Enter a brief description of your price (up to 20 characters). The description appears on your website.
Display no fee: Choose No charge from the Price-per-session drop-down if you don’t want to show the prices for services on your website.
- Choose an option from the Location drop-down menu to set your carrier:
- Business Address: The address you entered in the General Info tab will appear on your website along with other session details.
- Customer’s location: Service takes place at the address the customer entered when booking.
- Custom location: Enter a location (example: In a park). The location appears on your website.
- Offer this service as part of a membership or package.
- In the Additional Settings section, you can:
- No reservation for this service.
- Request approval for the reservation.
- Create a custom booking form.
Note:
- To hide the service that isn’t visible on your website, scroll up to the top right of the page and click the Show toggle button on your website to turn it off.
- If you show the services in the categories, select a category from the drop-down menu or click Add New Category to create a new category.
After creating the service, you can:
- Click Show Service Availability on a service in the Booking Services tab to see when it’s made available to the customer.
To begin, add Wix Bookings to your website. To add Wix Bookings:
- Click here.
- Click +Add.
After adding Wix Bookings, start building your business by creating your first service.
Essential checklist for professional booking site owners
Wix Bookings is an all-in-one online booking software that allows customers to book appointments or sign up for classes and courses. Wix online scheduling gives you the industry-leading tools you need to manage and grow your business online.
In this article, we’ll walk you through the steps needed to make online reservations and then show you how to manage your business and efficiently grow your online presence.
Set up your business
While there are loads of special, optional features in Wix Bookings, we’ve listed the essential steps you need to complete before you can launch and initiate registration.
Checklist required:
- Choose a template: Start with a stunning Wix template, or let Wix ADI Artificial Design Intelligence build your website.
- Choose a template
- Learn about ADI.
- Create your service: Choose which of our 3 services is right for you.
- Make an appointment
- Create a class.
- Create a course.
- Get any of your services online.
- Add staff: Someone working for you? Add them to your group.
- Add service provider.
- Allow employees to manage their calendars.
Tip: The default employee (you) is labeled “Employee # 1”. Don’t forget to edit the name.
- Set availability: If you provide appointment scheduling services, their availability is mainly based on your default business hours and those of our service providers.
- Set default working hours.
- Set staff hours.
- Set availability: Wix Bookings look on your website: Make it stunning!
- Decide where to show services on your website (All together? On separate pages?). looking for more information
Customize each page your customers see when they choose a service and order it:
- Service list
- Service page
- Calendar page
- Room reservation
- Payment information page
- Confirmation page
- Members area
- Set how you collect payments:
- Connect payment service providers (Wix Payments, Stripe, PayPal, etc.) to accept credit/debit cards and other payment methods online. looking for more information
- Choose how you want customers to pay for each service (Pay on booking? Pay on arrival?). looking for more information
- Offer packages or membership packages to customers. looking for more information
- Add your business details: Set up your business address, currency, time zone, and more. looking for more information
- Upgrade your website and connect your domain: Upgrade so customers can start booking services.
- Buy the Right Premium Plan for your business. looking for more information
- Get your own domain (available for 1 year for free with some Premium Plans).
- Publish your website: Ready to go? Click “Publish” and share your website with the world!
You may also want:
- Sync calendar: Sync employee Google calendar with Bookings calendar. Learn how
- Create booking rules & policies: Set limits on when a customer can book or cancel.
- Pre-book a time and amount of time close to a session that a customer can reserve. Learn how
- Set your cancellation policy.
- Customize your reservation form: Customers fill out the form while booking.
- Edit the form fields to gather the information you need.
- Personalize your automated email: Edit email text to match your branding style.
- Confirmation email
- Email reminder
- Cancel Email
Manage your business
Now that your business is up and running, it’s time to manage the reservations you have made.
- Customer management via Wix mobile app: Manage your business anytime – anywhere.
- Get the app.
- Invite customers to make reservations on the app.
- Turn on the waiting list.
- Mark attendance.
- Update payment status.
- Contact the participants of the session.
- Managing clients on desktop:
- Turn on the waiting list.
- Mark attendance.
- Update payment status.
- Take customer and business management to a new level with Ascend.
- Send customers an automatic reminder:
- Send a reminder via SMS.
- Email reminder.
- Manage your finances: Use any of the following 3rd party integrations:
- FreshBooks by OneSaas,
- QuickBooks by OneSaas
- Xero by OneSaas
Grow your business
Once your business is up and running, it’s time to let the world know about it. Wix offers many ways to advertise and engage customers. Here are some ideas to get you started.
- Marketing your business:
- Create social posts to share on Facebook and Instagram.
- Share service on social media.
- Offer coupons.
- Submit an email marketing campaign.
- Integration with marketing tools.
- Create a community:
- Blogs are great for sharing ideas and attracting new customers.
- Add a forum to spur discussion.
- Invite customers to complete the challenges you create for them.
- Let the members talk to each other.
- Activate your clients by creating a challenge (for example, a 30-day fitness challenge). Learn how
- Use Wix Chat to boost your business:
- Communicate with customers. looking for more information
- Use the lead collection form when you’re offline.
- Request payment via chat.
- Improve your website’s SEO: Take action so potential customers can find you on Google:
- Learn the basics.
- Use SEO Wiz to be found.
- Analytics: Get business data to help optimize your business.
- Check out your stats.
bePOS – Spa Management Software Highly Recommended To Use
bePOS is one of the most favorable POS systems for more than 10 countries around the world. The spa software is integrated with many features to support the management process of spa owners. Moreover, it is connected directly with customers through personal information data, gathering customer feedback. From there, the spa can conduct professional customer care services that meet their needs.
bePOS contains outstanding features of a POS system to support managers:
- Booking Management
- Cloud-Based
- CRM
- Report
- Inventory Management
- Cash Management
- Staff Management
- Treatment Management
Spa management software is designed to automate the day-to-day activities of the spa business and beauty parlor. It enables the spa managers to run their business, manage their daily schedule, appointment booking, staff, and inventory with just a button click. These functions help the spa owners save their time and save their money in the operation process.
Let’s bePOS become your best assistant right now!
Follow bePOS: